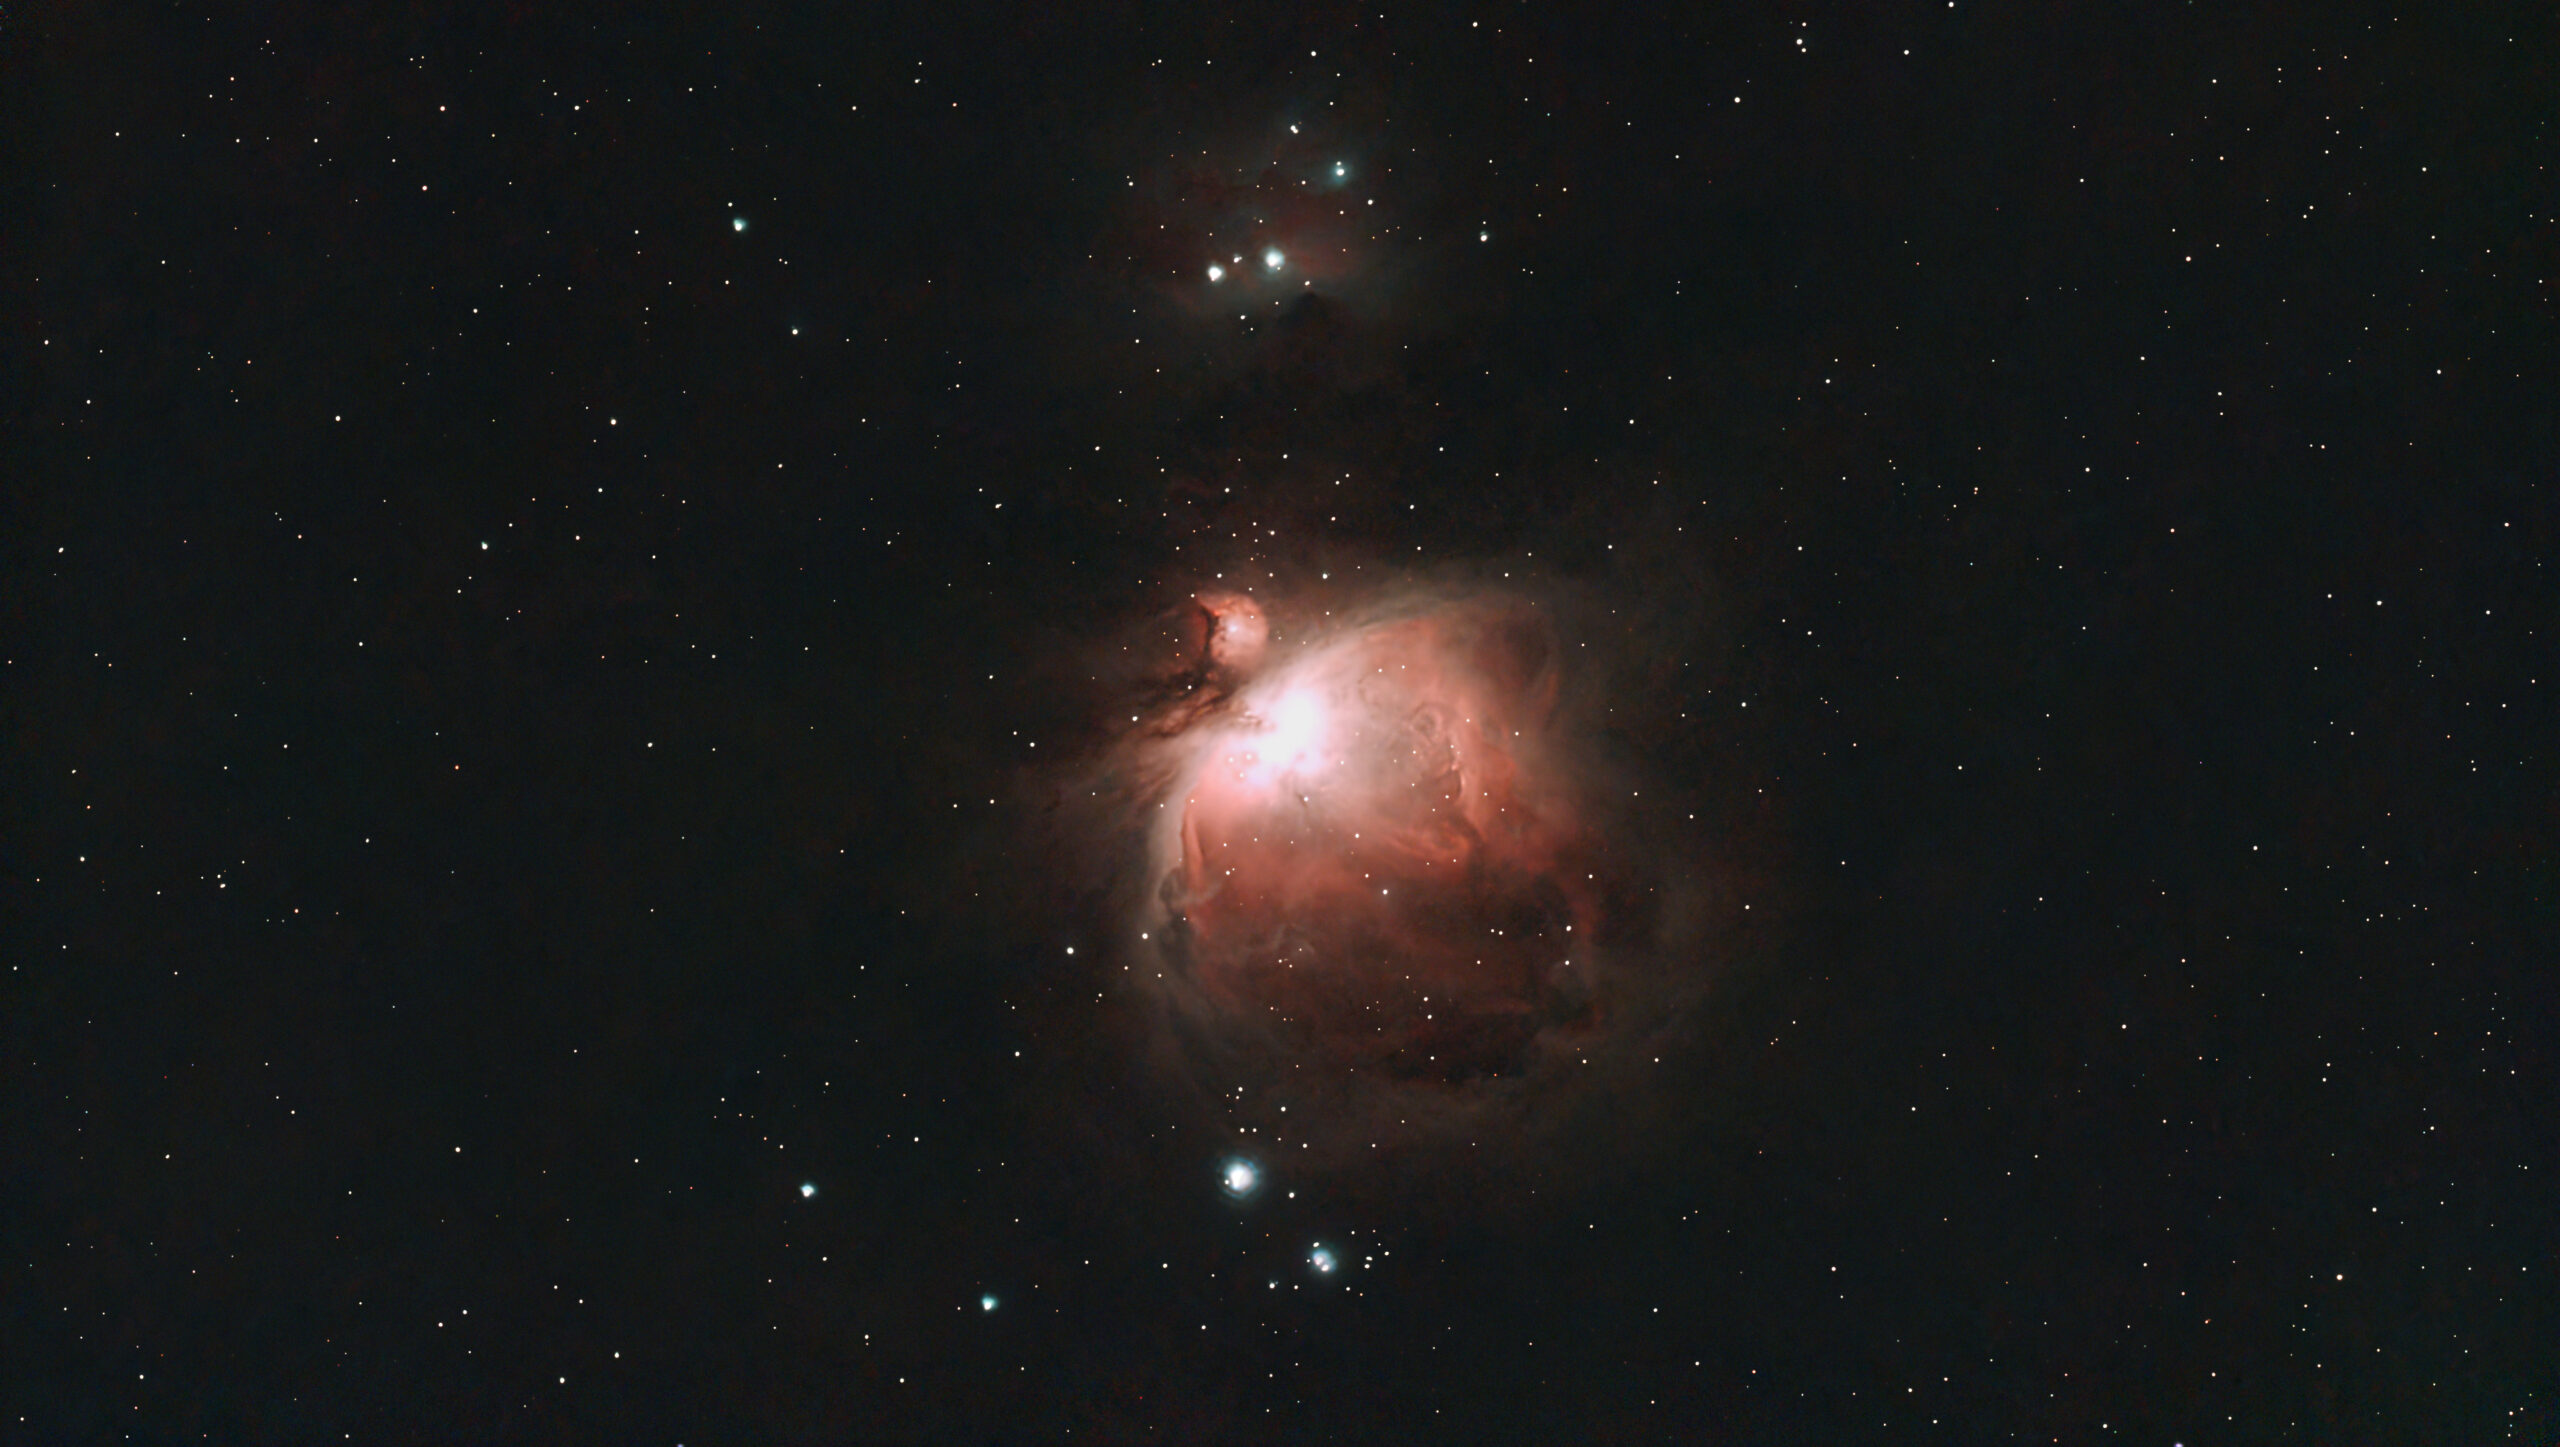
Category: Process

  • Rosette Nebula Processing Examples

    The Rosette Nebula processed in PixInsight.
    (more…)
  • Dwarf 3

    It took 5 months to get here but I finally got my Dwarf 3 telescope and had a chance to take some images. Now the images right from the telescope don’t look this good but you can download the .fits files and process them yourself. So I figured I try to learn how to do that. I used this tutorial as a starting point (I skipped re-stacking the images myself) and got some nice results. These are taken from my backyard in light-polluted Dallas, TX.

    M42 – The Orion Nebula
    The Horsehead Nebula
    (more…)
  • Spatial Photos and Videos with Fullscreen controls

    I think this is the best solution at the moment. I’ve added a button (labeled “spatial”) over these that triggers fullscreen. If you’re using an Apple Vision Pro, putting these in fullscreen will allow you to see the 3D versions. Everyone else will get 2D versions.

    your alt text
    <div class="media-container alignwide">
      <div class="video-container">
        <video controls playsinline="true" poster="https://exp.michaelverdi.com/styles/spatial-poster.jpg">
          <source src="https://exp.michaelverdi.com/styles/spatial.mov">
          <source src="https://exp.michaelverdi.com/styles/spatial.mp4" type="video/mp4">
        </video>
        <button class="fullscreen-button" onclick="goFullscreen(this)"><img src="https://blog.michaelverdi.com/media/apple-vision-pro-icon.svg"/></button>
      </div>
    </div>
    
    <div class="media-container alignwide">
      <picture>
        <source srcset="https://exp.michaelverdi.com/styles/spatial.heic" type="image/heic">
        <img class="photo" src="https://exp.michaelverdi.com/styles/spatial.jpg" alt="your alt text">
        <button class="fullscreen-button" onclick="goFullscreen(this)"><img src="https://blog.michaelverdi.com/media/apple-vision-pro-icon.svg"/></button>
      </picture>
    </div>
    
    <script>
      function goFullscreen(button) {
        const media=button.previousElementSibling;
        if (media.requestFullscreen) {
          media.requestFullscreen();
          }
        }
    </script>
  • Ugh WordPress

    I love having (what I think is) a cool website. I also want a blog. You can do that with WordPress but it’s a lot of work. It also seems that problems are likely to crop up at some point. They certainly did for me. I am absolutely not interested in trying to fix that stuff. So now I’ve got this new installation of WordPress on it’s on domain. I’m using the default theme with a tiny bit of additional CSS. Hopefully this will be easier to maintain.

  • Virtual Set v1

    I spent a little time over the weekend trying to bring The Phantom Moon to life. I created this in Blender, rendered out a still image, and then made a video out of it. This was recorded in my Apple Vision Pro.

  • Testing Spatial photo and Video embeds

    In VisionOS 2.2 (I’m on the developer beta), you can now “tap to view spatial photos and videos embedded on web pages” in Safari.

    So if you’re viewing this in Safari in VisionOS 2.2 you can select and hold the image which brings up a menu where you can select “View Spatial Photo.” To view the spatial video, tap it to start it playing and then tap the fullscreen button in the upper-left corner.

    The image and video are from a trip to The Morton Arboretum outside of Chicago.

  • I’ve got a Vision Pro app in beta

    A couple of weeks ago Anthony Maës released an open source immersive video player based on Mike Swanson’s work. It’s also published as an app that you can download on the Vision Pro. It’s now my go-to app for playing immersive MV-HEVC videos. I was hopeful I could use this to make an app for my work.

    For my purposes, I want an app that you can download and then just hit play to watch the thing I’ve made. Today that would be as close as I can get to the experience of watching Apple’s immersive videos in the TV app. So this weekend I set out to see if I could modify this player with a custom menu that only plays a video that I include with the app. Spoiler alert: I did it! Here’s roughly how:

    • I forked the Openimmersive GitHub repository.
    • I opened the forked project in Xcode.
      • I spent some time trying to make things work by hard-coding a stream URL into that section of the app. That worked, but streaming a 115 Mbit/sec video file from my shared hosting account sucks even with fiber internet. Not to mention this could get expensive.
      • So I copied the code for picking a file into ChatGPT and asked it to modify it to play a video file that was bundled with the app. It did it but it used AVKit which is Apple’s video playing framework. The issue with immersive video is that Apple doesn’t provide a framework for it. But this open source project is built on one (OpenImmersiveLib). So fixing this was a one-line change. I swapped out “import AVKit” with “import OpenImmersive” and it worked like a charm.
      • I deleted the menu parts I didn’t need.
      • I created a new app icon.
      • I learned how to exclude my giant video file from the GitHub repository.
    • I tested my app on my Vision Pro.
    • I committed all my changes to my forked repository on GitHub.
    • I followed these instructions for setting up my app on TestFlight.
    • And voilà – you can test it via TestFlight!

  • CineD Podcast on Immersive Filmaking

    Super informative interview. This covers all the stuff I’ve been learning on my own over the last 8 months.

  • Spatial Photo to Black & White Anaglyph

    The camera app in iOS 18 has a “Spatial” mode for iPhone 16 and 16 Pro. There you can switch between photos and video.

    I’ve always wanted to make a B&W anaglyph photo zine and while running this morning I realized that I knew how to make this work for images taken with my new iPhone.

    • Select your images in the Photos desktop app and use command+option+e to export them all at once.
    • Open the terminal and use Mike Swanson’s Spatial tool to split all the images into left and right views.
    for f in *.HEIC; do spatial export -i "$f" -o Left_$f.png -o Right_$f.png;done
    • Use Stereo Photo Maker to open sets of left and right images, and then use option+a to auto align the images.
    • Then export your image from Stereo Photo Maker

    Here’s one shot at my desk. I cropped this in Photoshop to see what it might look like in a 5.5″ X 8.5″ zine.

  • 16K Upscale

    I’ve seen a few VR180 creators on Reddit talk about turning their 8K footage from the Canon R5C into 16K. The examples I’ve seen do look better so I thought I’d try it out. I used Topaz Labs Video AI to upscale a 30 second clip that I shot while we on vacation in Guerneville, CA a couple of weeks ago.

    It took about 26 hours (!) to upscale the video on my Mac Studio (M1 Max processor). I just used the default settings. I imagine I can get better results in the future. Here are crops from the original and upscaled video.

    Original 8K video – click to view original
    Upscaled to 16K – click to view original
    (more…)